Discover the ultimate guide to optimizing your Fender Stratocaster. This comprehensive resource covers essential adjustments for playability, tone, and maintenance, ensuring your guitar performs at its best.
Overview of the Fender Stratocaster
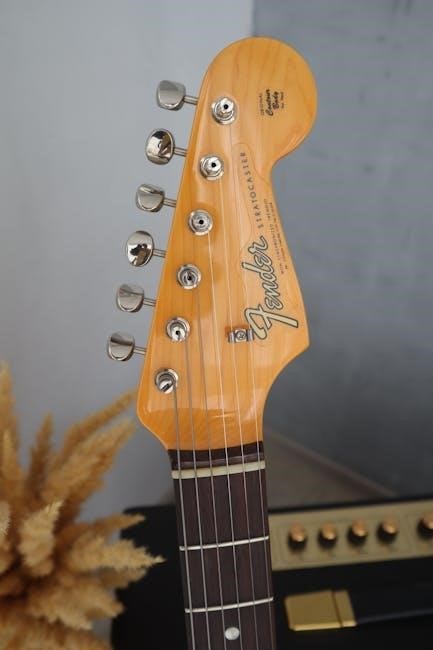
The Fender Stratocaster, introduced in 1954, is an iconic electric guitar known for its versatility and rich tone. Its design features a contoured body, bolt-on neck, and a unique tremolo system. The Stratocaster’s electronics include three pickups and a five-way switch, offering a wide range of tonal options. Proper setup is crucial for optimal playability and sound quality, involving adjustments to the truss rod, action, bridge, nut, and electronics. Regular maintenance, such as string stretching and fretboard care, ensures longevity and performance. Setup guides and manuals, including PDF resources, provide detailed instructions for achieving the best results.
Importance of Proper Guitar Setup
Proper guitar setup is essential for optimal playability, tone, and tuning stability. A well-adjusted Stratocaster ensures comfortable playing, reduces finger fatigue, and enhances sound quality. Correct string action, intonation, and neck relief prevent buzzing or fretting issues. Proper setup also maintains the guitar’s tuning stability, especially with the tremolo system. Additionally, it prevents premature wear on components like strings, frets, and the nut. Regular adjustments ensure the guitar performs consistently, making it vital for both beginners and experienced players to master these techniques for the best musical experience.
What to Expect in This Guide
This guide provides a detailed, step-by-step approach to setting up your Fender Stratocaster. It covers essential adjustments like truss rod alignment, string action, and intonation. You’ll learn how to optimize playability, achieve stable tuning, and enhance tone. The guide also includes tips for maintaining your guitar and troubleshooting common issues. With clear instructions and reference materials, this resource is designed to help players of all levels ensure their Stratocaster performs at its best. Follow along to unlock your guitar’s full potential.

Essential Tools and Materials for Setup
Gather an Allen wrench, screwdrivers, string winder, tuner, and cutting tools. These basics ensure precise adjustments for optimal playability and tone. Keep them handy for maintenance.
Basic Tools Required
Essential tools for a Fender Stratocaster setup include an Allen wrench for truss rod adjustments, screwdrivers for bridge and tremolo tweaks, a string winder, and a tuner. Add wire cutters for trimming strings and a ruler for measuring action. These tools ensure precise adjustments for optimal playability and tone. Keep them organized to streamline the setup process and maintain your guitar effectively. Proper tools are crucial for achieving professional results without damaging your instrument.
Recommended String Gauges
The Fender Stratocaster typically comes with standard 0.009 to 0.042 gauge strings, offering balanced playability and tone. Lighter gauges (0.008–0.038) suit bending and faster playing, while heavier gauges (0.010–0.046) provide fuller tone and sustain. For optimal tuning stability, Fender recommends using their Bullet strings with bullet-end design. Experiment with gauges to match your playing style and musical demands. Proper string selection ensures comfort and enhances performance, making it a critical part of your guitar setup.
Additional Materials for Maintenance
Keep your Stratocaster in prime condition with essential materials. Fender-recommended tools include Allen wrenches for truss rod and bridge adjustments. Use Fender Bullet strings for optimal tuning stability. For fretboard care, apply Fender guitar cleaner and polish to maintain playability and appearance. Lubricate the nut with graphite for smooth tuning. Regularly clean electronics with a soft cloth and avoid harsh chemicals. These materials ensure your guitar remains well-maintained, enhancing its performance and longevity. Refer to the setup guide for detailed care instructions.
Truss Rod Adjustment
Adjusting the truss rod ensures proper neck relief, critical for playability. Turn the rod a quarter revolution at a time, checking neck alignment regularly to avoid over-adjustment.
Understanding Truss Rod Function
The truss rod is a critical component in your Fender Stratocaster, designed to counteract string tension and maintain proper neck alignment. It allows you to adjust the neck’s curvature, ensuring optimal playability and action. Properly setting the truss rod prevents issues like buzzing strings or high action, which can hinder performance. By understanding how to use the truss rod effectively, you can achieve the perfect balance between playability and tone, ensuring your guitar feels and sounds its best at all times.
Measuring Neck Relief
To measure neck relief, press the low E string at the first and last frets. The recommended space between the string and the 7th fret is 0.008 to 0.012 inches. Hold the guitar at eye level and use a ruler or feeler gauge for accuracy. Proper neck relief ensures the strings are high enough to avoid buzzing but low enough for smooth playability. Adjust the truss rod if the relief is too high or low, turning it clockwise or counterclockwise as needed. This adjustment is crucial for optimal performance and tone.
Adjusting the Truss Rod
To adjust the truss rod, loosen the nut at the headstock or heel end with an Allen wrench. Turn the rod clockwise to straighten the neck or counterclockwise to add relief. Make small adjustments, checking the neck relief after each quarter turn. Proper adjustment ensures optimal playability and prevents buzzing or fretting out. Avoid over-tightening, as it can damage the neck. Always refer to the Fender Stratocaster setup guide for specific instructions and measurements to achieve the desired neck alignment.

Action and String Height
Action and string height are critical for playability. Measure string height at the nut and bridge, adjust as needed, and ensure proper setup for optimal performance.
Measuring String Height at the Nut
To measure string height at the nut, fret the string at the third fret and check the gap between the bottom of the string and the first fret. Use a ruler or feeler gauge for accuracy. Ensure the measurement aligns with Fender’s recommended specifications, typically 0.008″ to 0.012″ for the low E string and 0.039″ to 0.059″ for the high E string. Proper string height at the nut is crucial for smooth playability and preventing buzzing or fretting issues.
Measuring String Height at the Bridge
Measuring string height at the bridge ensures proper action and playability. Use a ruler or feeler gauge to measure the gap between the bottom of the string and the top of the 12th fret. For the low E string, aim for 0.012″ to 0.016″, and for the high E string, 0.039″ to 0.059″. This adjustment affects both playability and tuning stability. Proper string height at the bridge is essential for achieving optimal tone and preventing issues like buzzing or overly sharp strings.
Adjusting the Bridge for Proper Action
Adjusting the bridge for proper action ensures optimal playability and tone. Use an Allen wrench to turn the bridge screws, raising or lowering the bridge to achieve the desired string height. For the low E string, aim for 0.012″ to 0.016″ at the 12th fret, and for the high E string, 0.039″ to 0.059″. Make small adjustments and check measurements frequently. Proper action reduces buzzing and ensures smooth playing, while also maintaining stable tuning and clear tone.
Nut Setup and Maintenance
Proper nut setup ensures smooth tuning and optimal string height. Inspect for wear, adjust string slots as needed, and lubricate for frictionless performance and clear tone.
Checking the Nut for Wear
Inspect the nut for excessive wear or grooves. Check string height at the first fret and ensure proper clearance. Address any issues to prevent tuning instability and buzzing.
Adjusting the Nut for Proper String Height
Adjust the nut slots using precision files or a nut saw to achieve the recommended string height. For the low E string, aim for 0.015″-0.017″ and 0.012″-0.014″ for the high E string. Ensure smooth transitions and proper alignment to maintain consistent playability across the fretboard. This adjustment is crucial for optimal tuning stability and a comfortable playing experience.
Lubricating the Nut for Smooth Tuning
Apply a small amount of graphite or guitar-specific lubricant to the nut slots. Use a soft cloth to spread evenly, ensuring smooth string movement. Avoid excess, as it can attract dust. This step enhances tuning stability and minimizes friction, allowing strings to glide freely. Regular lubrication maintains optimal performance and prevents wear. Ensure the nut remains clean and well-maintained for consistent playability and precise tuning.

Bridge and Tremolo System
The Stratocaster’s bridge and tremolo system are crucial for tuning stability and playability. Proper setup ensures smooth tremolo operation and consistent string action, enhancing overall performance.
Overview of the Stratocaster Bridge
The Stratocaster bridge is a vital component designed for versatility and performance. It features adjustable saddles for precise intonation and string height settings, ensuring optimal playability. The bridge also incorporates a tremolo system, allowing for pitch variations. Properly setting up the bridge involves balancing spring tension and string action to maintain stable tuning. This section provides a detailed overview of the bridge’s functionality and its role in the guitar’s overall setup and performance.
Adjusting the Tremolo Spring Tension
Adjusting the tremolo spring tension ensures stable tuning and optimal tremolo response. Start by accessing the spring cavity, typically located on the back of the guitar. Turn the spring tension screws clockwise to increase tension or counterclockwise to decrease it. Aim for a balance where the tremolo system feels responsive but doesn’t cause tuning instability. Proper tension adjustment enhances the guitar’s playability and maintains tuning integrity during use of the tremolo arm. This step is crucial for achieving professional-level setup results.
Setting Up the Tremolo for Stable Tuning
Setting up the tremolo for stable tuning involves balancing the spring tension and string tension. After adjusting the spring tension, tune the guitar and test the tremolo arm. Ensure the strings return to pitch accurately after bends or dives. If tuning stability issues arise, check the nut and bridge for proper setup. Lubricating the nut and bridge saddles can also improve tuning consistency. A well-adjusted tremolo system enhances playing experience, allowing for smooth, responsive performance without compromising tuning accuracy or overall guitar stability.

Electronics Setup
Optimize your Stratocaster’s electronics for tone and functionality. Adjust pickup heights, wire connections, and shielding to ensure clear, noise-free sound and reliable operation for every performance.
Understanding the Stratocaster Wiring
The Stratocaster’s wiring is designed for versatility and tone. It features three pickups, a 5-way selector switch, and controls for tone and volume. The wiring diagram allows for various configurations, such as the neck, middle, and bridge pickups in combinations or individually. The master volume control regulates overall output, while the two tone controls adjust the neck/middle and bridge pickups separately. Proper wiring ensures clear, noise-free sound and reliable performance. Understanding the circuit is key for customizing your Stratocaster’s electronics to suit your playing style.
Adjusting the Pickup Heights
Adjusting the pickup heights is crucial for achieving optimal tone and output. Properly set pickups ensure even response and avoid muddiness or brightness. Use a screwdriver to raise or lower the pickups, typically keeping the neck pickup slightly lower than the bridge. Measure the distance between the strings and the pickup poles, aiming for 1.5mm to 2mm for the low E string and 2mm to 3mm for the high E string. This balance ensures clarity, sustain, and a well-rounded sound across all strings.
Shielding the Electronics for Reduced Noise
Shielding your Stratocaster’s electronics minimizes unwanted noise and hum. Apply copper shielding tape or conductive paint to the guitar’s cavities and metal components. This creates a Faraday cage, reducing electromagnetic interference. Ground the bridge and tremolo system to ensure proper shielding. Use a multimeter to verify connections and continuity. Shielding enhances tone clarity and protects against external interference, ensuring a quieter, more professional sound. Regular maintenance and proper grounding are essential for optimal performance and noise reduction.
Intonation and Tuning
Proper intonation ensures each string plays in tune across the fretboard. Adjust the bridge saddles to match the string’s octave at the 12th fret. Use a tuner for accuracy, and check each string’s pitch. Fine-tune by moving the saddle forward or backward. Fender recommends using the factory-specified string gauges for optimal tuning stability. This process ensures clear, resonant notes and consistent tuning across all frets, enhancing your Stratocaster’s playability and tone.
Understanding Intonation Adjustment

Intonation adjustment ensures each string plays in tune across the entire fretboard. This process involves setting the bridge saddles to align the string’s pitch at the 12th fret with its open-string note. Proper intonation is critical for clear, accurate tones and prevents fretted notes from sounding sharp or flat. Using a tuner, compare the open string’s pitch to its 12th fret octave. Adjust the saddle position forward or backward to achieve perfect tuning. This precise calibration enhances playability and tone consistency.
Setting Intonation for Each String
Setting intonation for each string ensures precise tuning across the fretboard. Start with the low E string, pluck it open and at the 12th fret. Adjust the bridge saddle forward or backward to match the octave. Repeat this process for the A, D, G, B, and high E strings. Use a tuner for accuracy and a screwdriver to move the saddles. Proper intonation guarantees clear, consistent tones and eliminates sharp or flat notes, enhancing overall playability and musical accuracy.
Final Tuning and Playability Check
After completing the setup, tune your Stratocaster and play each string across all frets to ensure clarity and consistency. Check for buzzing or dead spots by fretting each string at various positions. Verify that the action is even and comfortable, and that the tremolo system returns to pitch accurately. Fine-tune any adjustments as needed. Finally, play chords and scales to confirm smooth, even performance. This final check ensures your Stratocaster is optimized for peak playability and tone, ready for any musical endeavor.
Additional Tips for Optimal Playability
Regularly stretch new strings and clean the fretboard to maintain tone and feel. Lubricate the nut and bridge for smooth tuning and reduced wear.
String Stretching and Break-In
String stretching is crucial for stable tuning. After installing new strings, gently pull each string away from the fretboard and release repeatedly. This process reduces tuning issues and extends string life. Ensure even tension to avoid neck adjustments. Proper break-in enhances playability and ensures consistent performance, especially for guitars with tremolo systems. Regular stretching maintains tuning stability and optimal sound quality, making it a vital step in your Stratocaster’s setup routine for both new and experienced players alike.
Fretboard Maintenance
Regular fretboard maintenance ensures smooth playability and prevents wear. Clean the fretboard with a soft cloth and guitar-specific cleaner, avoiding harsh chemicals. For rosewood or ebony boards, apply a fretboard conditioner to hydrate the wood and protect it from drying out. Avoid using oils on maple fretboards to maintain their natural finish. Proper care extends the life of your Stratocaster and keeps it sounding and playing its best, ensuring years of optimal performance and tone.

Resources and Further Reading
Explore official Fender manuals, detailed setup guides, and online forums for in-depth Stratocaster setup information. Download free PDFs, including Ron Kirn’s booklet, for expert advice and troubleshooting tips.
Fender Stratocaster Setup PDF Guides
Access comprehensive PDF guides for your Stratocaster setup. These detailed manuals include step-by-step instructions, specifications, and troubleshooting tips. Download resources like Ron Kirn’s booklet and Fender’s official setup procedures to ensure optimal adjustments. Whether you’re adjusting the truss rod, setting intonation, or maintaining electronics, these guides provide expert knowledge. They cover various models, including vintage and modern Stratocasters, offering tailored advice for every player’s needs. These PDFs are essential for achieving professional-level results at home.
Recommended Manuals and Documentation
For precise guidance, refer to Fender’s official manuals, such as the 2011 Owners Manual and 2013 Electric Guitars manual. These documents provide detailed setup procedures and specifications for Stratocasters, including vintage models from the 1970s and 1980s. Additionally, the Strat Plus Setup Procedures (1987) and Stratocaster Wiring Diagrams are invaluable resources. Download these PDFs to access expert instructions for truss rod adjustments, intonation, and electronics. They also include maintenance tips and troubleshooting guides, ensuring your Stratocaster is optimized for performance and longevity.
Online Communities and Forums
Join online forums like TDPRI or Reddit’s r/guitar for valuable insights and discussions on Stratocaster setup. These communities offer expert advice, troubleshooting tips, and shared experiences. Members often post detailed guides, photos, and videos to help with specific adjustments. Engage with enthusiasts to learn about optimal string gauges, truss rod tweaks, and electronics modifications. Additionally, find resources like PDF guides and maintenance tips shared by experienced players and technicians. These forums are a great way to connect, learn, and refine your Stratocaster setup skills effectively.
Mastering your Stratocaster setup ensures optimal playability and tone. Follow these steps to achieve professional results and enjoy your instrument’s full potential effortlessly always.
Final Checklist for a Proper Setup
Ensure truss rod adjustment for neck relief, proper string action at nut and bridge, accurate intonation, and pickup height alignment. Lubricate the nut, check bridge stability, and confirm tuning stability. Verify all electronics function correctly and the fretboard is clean. Stretch strings and play-test for smooth performance. Refer to your Fender Stratocaster setup PDF for detailed specifications and guidelines to achieve a professional setup and maintain your guitar’s optimal playability and tone.
Maintaining Your Stratocaster
Regular maintenance ensures your Stratocaster remains in prime condition. Clean the fretboard with a soft cloth and appropriate cleaner, polish hardware to prevent tarnish, and inspect strings for wear. Stretch new strings and retune periodically for stability. Check electronics for connectivity and adjust as needed. Store your guitar in a hard case to protect it from dust and humidity. Follow the recommendations in your Fender Stratocaster setup PDF for a tailored maintenance routine to preserve tone and playability over time.
Enjoying Your Optimized Guitar
With your Stratocaster properly set up, you can now fully embrace its legendary playability and tone. Explore a wide range of musical styles, from crisp cleans to vibrant leads, with confidence. The optimized setup enhances your connection to the instrument, allowing for effortless creativity. Whether you’re practicing, recording, or performing, your Stratocaster is ready to deliver its iconic sound. Take inspiration from the guitar’s rich history and the legends who’ve shaped music with it. Your optimized Stratocaster is more than a tool—it’s a gateway to endless musical possibilities.