
Assembling a greenhouse requires careful planning and adherence to instructions․ This guide provides a comprehensive walkthrough, covering preparation, frame assembly, and safety precautions to ensure a secure and functional structure․
1․1 Importance of Following Assembly Manual
Adhering to the assembly manual ensures compliance with safety standards and structural integrity․ Deviations may lead to instability, leaks, or damage․ Proper assembly guarantees optimal performance and longevity of the greenhouse, preventing issues like misaligned frames or compromised ventilation․ It is crucial to follow the instructions precisely to avoid voiding warranties and ensure the greenhouse withstands environmental stresses like wind and snow loads effectively․
1․2 Brief Overview of the Assembly Process
The assembly process involves preparing the site, constructing the frame, and installing the cover and accessories․ Start by ensuring a flat, level base, then assemble side sections, followed by front and back frames․ Secure the roof structure and attach the poly film or polycarbonate panels․ Install doors and vents for proper ventilation․ Follow the manual step-by-step to ensure a secure, weather-tight, and functional greenhouse․ Safety precautions and tool preparation are essential throughout․
Preparation Before Assembly
Begin by checking the parts list and gathering necessary tools․ Ensure the site is level and square, and wear protective gear like gloves and sturdy footwear․
2․1 Checking the Parts List
Before assembly, verify that all components are included by cross-referencing with the provided parts list․ Ensure no items are missing or damaged․ This step is crucial to avoid delays and ensure smooth assembly․ Pay attention to hardware like bolts, nuts, and washers, as well as structural elements like frames and panels․ Organize parts neatly for easy access during the process․
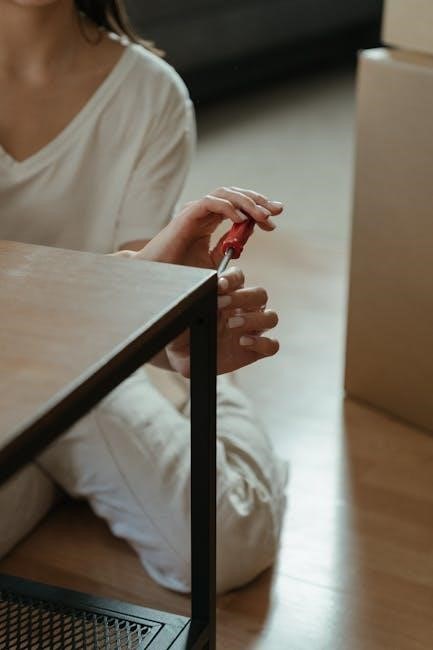
2․2 Necessary Tools and Safety Precautions
Necessary tools include screwdrivers, wrenches, hammers, and utility knives․ Wear protective gloves, safety glasses, and sturdy footwear to handle materials safely․ Ensure proper ventilation and avoid overexertion․ Handle glass and fragile components with care to prevent breakage․ Secure the structure as you build to prevent collapse․ Follow all safety guidelines to ensure a safe and successful assembly process․

Site Preparation
Ensure the site is flat, level, and square․ Clear debris, mark boundaries, and check for proper drainage․ Consider wind direction and snow load for optimal placement․
3․1 Ensuring a Flat and Level Base
A flat and level base is critical for stable greenhouse assembly․ Use a spirit level to verify evenness and a shovel to adjust uneven ground․ Ensure the site is square by checking diagonal measurements․ Proper drainage is essential to prevent water pooling․ If necessary, compact the soil or lay a gravel base for stability․ This step ensures the foundation is substantial enough to support the greenhouse structure safely and securely․
3․2 Considering Wind Direction and Snow Load
Position your greenhouse away from direct wind paths to minimize structural stress․ In snowy areas, ensure the design can handle expected snow loads․ Regularly clear snow exceeding 2 inches to prevent roof damage․ Proper foundation preparation and a sturdy frame are crucial for withstanding harsh weather conditions․ Consider local climate factors to ensure your greenhouse remains stable and secure throughout the year․
Foundation Options
This section outlines two foundation options to ensure stability․ Choose between a concrete base or a wooden platform, both designed to support the greenhouse’s weight and withstand environmental conditions․
4․1 Preparing the Base for Assembly
Preparing the base is essential for a stable greenhouse․ Ensure the surface is flat, level, and square․ For a concrete base, pour a slab thick enough to support the greenhouse’s weight․ For a wooden platform, use treated timber and secure it firmly․ Check that the base aligns perfectly with the foundation type chosen, ensuring it can bear the weight of the structure, including glass or polycarbonate panels, for a sturdy and durable installation․
4․2 Two Foundation Options Explained
The first foundation option is a concrete slab, which provides maximum stability and durability․ Pour a slab of appropriate thickness to support the greenhouse’s weight, ensuring it is level and square․ The second option is a wooden base, using treated timber for durability․ Secure the frame to the wood using anchor bolts, ensuring the base is substantial enough to hold the structure firmly in place for long-term stability․

Frame Assembly
Frame assembly begins with constructing side sections, followed by back and front sections․ These are then joined together to form the main structure, with the roof assembled last․
5․1 Constructing Side Sections
Constructing side sections is the first step in frame assembly․ Gather all required parts and tools, ensuring the base is level․ Align the side frames according to the manual, securing them with bolts․ Attach supports and braces for stability․ Double-check the alignment and tighten all connections firmly․ Ensure the sections are square and plumb before proceeding to the next step․
5․2 Building Back and Front Sections
Construct the back and front sections using the provided frame components․ Attach the top and bottom rails to the vertical posts, ensuring proper alignment․ Secure the sections with bolts, following the sequence outlined in the manual․ Install crossbeams for added stability and align the sections with the side frames․ Verify that all connections are tight and the structure is square before proceeding to the roof assembly․
5․3 Joining Sections and Assembling the Roof
Align and connect the side, front, and back sections securely using the provided bolts and connectors․ Ensure all joints are tight and the frame is square․ Begin assembling the roof by attaching the rafters to the ridge bar and eave beams․ Install crossbeams for added stability․ Place the roofing material, ensuring it is evenly spread and securely fastened․ Verify the roof’s structural integrity and check for any gaps or leaks before finalizing․

Cover Installation
Attach poly film or polycarbonate panels to the frame, ensuring a snug and even fit․ Secure the cover with provided clips or fasteners to maintain structural integrity and prevent leaks․
6․1 Attaching Poly Film or Polycarbonate Panels
Begin by attaching the poly film or polycarbonate panels to the greenhouse frame․ Start at the roof peak and work downward, ensuring a snug fit․ Use clips or fasteners provided in the kit to secure the cover tightly․ Tighten evenly to avoid wrinkles or sagging․ Check for any slack and make adjustments as needed to ensure a proper seal․ Secure all edges firmly to maintain structural integrity and weather resistance․
6․2 Securing the Cover to the Frame
Once the poly film or polycarbonate panels are in place, secure them tightly to the frame using clips, wiggle wire, or fasteners․ Ensure a snug fit by tightening evenly across the surface․ Check for any slack or wrinkles and adjust as needed․ Use rubber edges or weatherstripping to seal gaps and prevent air leaks․ Double-check all fasteners to ensure they are tightly secured for durability and weather resistance; Inspect the cover for a taut, even finish․
Door and Vent Installation
Assemble and mount the door securely, ensuring proper alignment․ Install vents to provide adequate ventilation and airflow within the greenhouse, promoting healthy plant growth and maintaining temperature balance․
7․1 Assembling and Mounting the Door
Begin by assembling the door components, ensuring all parts are included․ Attach wheels to the wheelhousing using M4 nuts, bolts, and washers․ Secure the wheelhousing to the door frame․ Align the door with the greenhouse frame and fasten it properly․ Ensure the door opens smoothly and closes securely․ Double-check all connections for stability and functionality before finalizing the installation․
7․2 Installing Vents for Proper Ventilation
Ensure proper ventilation by installing vents in strategic locations․ Position vents to allow airflow circulation, typically on opposite sides or near the roof․ Align vent frames with the greenhouse structure and secure them tightly․ Use provided hardware to fasten vents, ensuring airtight seals․ Test vent functionality to confirm they open and close smoothly, promoting healthy plant growth and temperature regulation within the greenhouse․

Safety Precautions During Assembly
Always wear protective gloves and sturdy footwear when handling glass or sharp components․ Ensure a safe working environment to minimize risks of injury during assembly․
8․1 Wearing Protective Gear
Wearing protective gear is essential during greenhouse assembly to prevent injuries․ Use sturdy gloves to handle sharp or heavy components, and wear safety glasses to protect your eyes from debris․ Ensure footwear is robust to prevent accidents while moving parts․ Always check that protective equipment is in good condition before starting assembly․ This ensures a safe working environment and minimizes risks associated with handling materials like glass or polycarbonate panels․
8․2 Handling Glass and Fragile Components
When handling glass or fragile components, exercise extreme caution to avoid breakage and injury․ Always lift glass panels with both hands, ensuring a firm grip to prevent slipping․ Inspect each pane for cracks or damage before installation․ Store fragile parts in a safe, protected area away from foot traffic․ Use a soft, padded surface for temporary placement to minimize risk of damage․ Avoid applying excessive force, as this can lead to breakage․ Always prioritize gentle handling to ensure the integrity of the greenhouse structure․
Maintenance Tips
Regular inspection and cleaning are crucial for maintaining greenhouse integrity․ Check for damage, ensure proper ventilation, and replace worn parts promptly to guarantee optimal performance and longevity and functionality․
9․1 Regular Inspection of the Structure
Regular inspections are vital to ensure the greenhouse remains secure and functional․ Check for signs of wear, damage, or misalignment in the frame and panels․ Verify that all bolts, screws, and fasteners are tightly secured; Inspect the foundation for stability and levelness, ensuring it remains substantial enough to support the structure․ Examine the cover for tears or gaps, and test door and vent mechanisms for smooth operation․ Address any issues promptly to prevent further damage and maintain optimal conditions for plants․
9․2 Cleaning and Replacing Worn Parts
Regular cleaning is essential to maintain the greenhouse’s functionality; Use mild detergents and soft brushes to remove dirt and debris․ Inspect for worn or damaged parts, such as bolts, hinges, or panels, and replace them promptly․ Ensure all moving components, like vents and doors, are lubricated and functioning smoothly․ Addressing wear early prevents further damage and ensures the structure remains stable and secure for optimal plant growth․

Troubleshooting Common Issues
Identify common problems like leaks, misaligned frames, or panel damage․ Inspect all connections, tighten loose parts, and ensure proper alignment․ Refer to the manual for guidance․
10․1 Addressing Leaks and Structural Weaknesses
Inspect the greenhouse for leaks by checking all connections and seals․ Ensure poly film or panels are securely fastened․ For structural weaknesses, verify the frame’s alignment and tighten any loose bolts․ Addressing issues promptly prevents further damage․ Regularly inspect the foundation and ensure it remains level and stable․ If leaks persist, reapply seals or replace damaged panels to maintain the greenhouse’s integrity and functionality․
10․2 Fixing Misaligned Frames or Panels
Inspect the frame and panels for misalignment․ If sections are uneven, gently realign them, ensuring all connections are secure․ Use shims or adjust the foundation if necessary․ Tighten any loose bolts and verify that all parts fit snugly․ Regularly check for misalignment to prevent structural issues․ Proper alignment ensures stability and prevents damage from wind or snow․ Addressing misalignment early maintains the greenhouse’s integrity and functionality․
Successful assembly ensures your greenhouse is ready for use․ Double-check all components for stability and functionality․ Proper assembly guarantees a durable and efficient growing environment․
11․1 Final Checks Before First Use
Before using your greenhouse, perform a thorough inspection to ensure all parts are securely assembled and functioning properly․ Verify that doors and vents open smoothly, and check for any damage to panels or frames․ Ensure the structure is level and stable, and all components are tightly secured․ Review the manual to confirm no steps were missed․ This final check guarantees safety and optimal performance for your greenhouse․
11․2 Ensuring Compliance with Manual Instructions
Adherence to the assembly manual is crucial for structural integrity and safety․ Deviations from the instructions may lead to improper assembly, potentially causing damage or injury․ Always follow the step-by-step guide provided, as it ensures compliance with safety standards and optimal performance․ Failure to comply may void warranties or lead to operational issues․ Strictly adhering to the manual guarantees a safe and functional greenhouse setup․

Final Checks and Inspection
Conduct a thorough inspection to ensure all components are securely assembled․ Verify the base is level, frames are aligned, and all parts are tightly fastened․ Check for any gaps or loose connections that could compromise structural integrity․ Ensure proper ventilation and door functionality before finalizing the setup․ A complete inspection guarantees the greenhouse is safe and ready for use․
12․1 Verifying All Parts Are Securely Assembled
After completing the assembly, perform a detailed inspection to confirm all parts are securely attached․ Check every bolt, screw, and connection to ensure they are tightly fastened․ Verify that the frame is sturdy, panels are properly aligned, and the roof is evenly supported․ Ensure the base is level and the structure is stable․ Double-check that all components, including doors and vents, are functioning correctly and safely․ This step ensures the greenhouse is durable and ready for use․
12․2 Ensuring the Greenhouse is Ready for Use
After verifying all parts are securely assembled, conduct a final inspection to ensure the greenhouse is ready for use․ Check for any leaks, ensure vents and doors open smoothly, and test automatic openers if installed․ Confirm that all panels are securely attached and the structure is stable․ Clean the interior and exterior surfaces to remove dirt or debris․ Finally, review the manual to ensure compliance with all safety and operational guidelines before planting․